Making the Most of a Small Space

When we moved to San Francisco, I knew I’d have to take our furniture and make it work in a city apartment.  It was a challenge, but I had a plan:

1-Position two white arm chairs  in front of the window to create a cozy seating area (Marshall’s idea – thanks babe!)  2-Repurpose the file cabinets from our old office into end tables so our files don’t have to be reorganized  3-Hang sheer linen drapes from our old living room  windows against the beautiful arched window 4-Keep the beloved factory cart coffee table and position two rattan floor cushions nearby for extra seating 5-Use the natural fiber rug from our old master bedroom to anchor the space

One of the biggest dilemmas was figuring out where to keep all of our clothes since the closet was now the bedroom.  My husband took on the challenge and found this great wardrobe from IKEA.  It really is the perfect solution to our storage issues.  How we managed to go from having his and hers walk-in closets to this, I’ll never know!

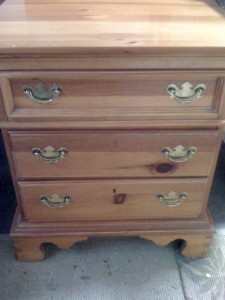
Another piece that was important to incorporate was the bureau from our old bedroom.  It took a long time to paint and distress, and I couldn’t give it up!  It provides extra storage for everything from blankets to books.

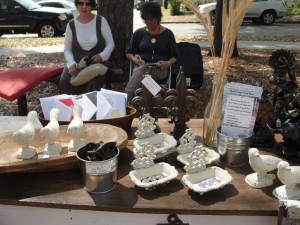
I tried to keep a lot of the accent pieces we had in our home, like this gorgeous vase filled with dried wheat which kind of reminds me of growing up in Kansas.

I also wanted to keep the nautical feel especially since we’re living so close to the water.

Finally, one of my favorite aspects of this apartment is the eat-in kitchen.  With plenty of wall space for our pizza trays and cutting board, plus enough room for our kitchen table.  It’s a cozy space, but perfect for two.

It’s hard to believe we only moved in just over a week ago!  It’s my husband’s birthday today, so I’ve got a cheesecake in the oven and a brand new lasagna recipe to try, and I’m just glad we have such a lovely space to celebrate in!

Walk-in Closet+Imagination=Bedroom?

So I never thought my master bedroom would be the size of a closet…or an actual closet for that matter.  But now it is both.  Here is how I took a walk-in closet in our studio apartment and made it into our master bedroom.

First, I tried to envision the space as more than a closet (and had my husband take down the clothing rod).

Next I took some of my favorite pieces and used them to fill the white space.  The rustic ladder for example.  I wasn’t sure why I was bringing it to San Francisco when it was collecting dust in my garage in Florida, but it turned out to be a great way to punch up a white wall and add some soft candlelight.


Then I filled an empty corner with a beat up old table, one of my favorite flea market finds.  I added an antique styled fan on the corner table which drowns out the city noise at night.  Even though it’s an awkward angle, this photo gives a bit of perspective on how everything comes together in the space.

I added my beloved horse painting above the bed, a pair of white drapes that were once the shower curtains in my master bath, and a floor lamp beside the bed, perfect for reading at night.


Because of the angle of the door to the ‘closet’, it’s hard to capture the warmth of the space.  It’s definitely cozy, but I think I’ve slept better here over the last few nights than I have in months!

The Guest Bath Redo

I have never posted a picture of my guest bath anywhere before…and I think this photo alone will tell you why

Btw, my husband took the ‘before’ photos, not that I’m saying the pictures are crooked or anything.

The main point is, you can see the bathroom was total hideousness.  I kept the door closed at all times and cringed when guest came to stay.

Until one day we decided to attack the red and white stripes.  I sprayed the whole room down with Downy Wrinkle Release.  A tip I heard from a good friend (thanks Jessica!), was to use a mix of fabric softener and water to help soften the paper.  Seeing as I was out of fabric softener and too lazy to run to the store, I used some wrinkle releaser instead and it worked like magic (although removing wallpaper sucks no matter how good of a tip you have for removing it).

Next we had the bathroom painted a soft blue and the cabinets painted a crisp white

I added a few details like the foam wrapped burlap over the window (only I know it’s safety pinned in the back…I guess now you do, too but you could never tell just by looking at it!), plus a woven mat, and a couple of strategically placed baskets.

I used to avoid this room at all costs, but now I can’t wait to have guests over so they can use it.  I might even take a bath in there tonight myself!

A Chair to Remember

Before                                                                After


Here’s how I did it.

I started with a chair I found a few years ago for $40.00, but couldn’t find a place for it in my home.

First I painted it with a base coat of white paint to soften the existing black.

I wasn’t too worried about the fabric getting damaged because I knew I would recover it.

The next step was to remove the chair seat and back.

With a Phillips screwdriver, I removed each of the four screws.

And voila, the seat was off!  My husband helped remove the back of the chair because it required a little more muscle, but it only took a couple of minutes.

I had some extra burlap fabric lying around, which was only a couple of dollars a yard.  You could literally use any fabric to give the chair whatever feel would work best in your home.

Next I cut the fabric and laid the seat on top of it so I could wrap it in the burlap.

This staple gun we picked up at a garage sale for 50 cents was the best 50 cents I’ve ever spent!  I used it to secure the fabric to the bottom of the seat.

Next I painted the chair with a second coat of paint.  For this coat I used a paint by Behr called Wild Honey.  Then I took some fine grit sandpaper and sanded down the edges of each leg.

I continued sanding down the rest of the chair for a distressed, lived in look.

Finally I reattached the chair seat and back, and now I have a lovely new chair!  The whole project took less than two hours.  I love my new chair and I love it even more knowing I refinished it myself.  I’ve never done a project like this one before, but it was so easy I will definitely do it again!

The Great Nightstand Debate

So after a little pow wow with the sister-in-law-to-be, and a couple more coats of paint, the nightstands are finally complete.  I would up going for a his and hers theme, so they are similar but not identical.

HIS

HERS

And the finished product – the updated Master, which includes a new relaxed pillow from the line!

Now we need new lamps.  And a larger rug would nice.  Oh, and what to do about that dark mirror…

The Nightstand Dilemma

I have been talking about changing our nightstands so often, I’m afraid my husband is going to zap me with the Taser we keep in his top drawer.  The thing is, I love the beachy vibe in my living room and the resort feel in my guest bedroom, but our master bedroom doesn’t have a coastal vibe at all, and that’s going to change, starting with the nightstands.

They were another freebie from Grandma Rose (or payback for the ones she stole from my garage when I wasn’t looking).

Not exactly my style, so I decided to try a couple different approaches.  With one, I went with a few coats of creamy white paint with a little blue green underneath.  I painted the handles as a quick fix until I can find the right hardware.

A great tip I learned from my mother-in-law is to keep the paint brush sealed in a plastic bag so it won’t dry out in between coats.

With the second nightstand, I went with a more distressed, worn in look. Since the hardware is an odd size, I’ll have to find them online once I decide which look I want.

And that’s where you come in.  Help me decide by leaving a comment with one simple word – White or Blue?

Pearls of (Pillow) Wisdom

I haven’t been at the pillow line very long, but I’ve already learned a few crucial lessons along the way.

1-Do no get sidetracked from your original business plan and strategy (i.e. just because you fall in love with baby fabric doesn’t mean you should branch into a baby line when you haven’t even finished launching the main line)

2-Stay focused on fulfillment using the initial fabrics you selected so you have samples and inventory, just in case a boutique is willing to carry your product – which is the whole point, right?!

3-Try not to have a medical emergency which can really throw the whole business plan out of whack!

4-Instead of boo hooing over said medical emergency, focus on the things you CAN do so your business doesn’t lose momentum, like order business cards (that look like pillows) which everyone has asked for and you haven’t been able to provide

5-Take pictures in your own home to showcase pillows for future brochures and website applications

Hope that you continue to learn from the process and remember to be thankful for the things you do have in life like a new house, an adorable husband, the sweetest dogs ever, loving family members who bring you yummy dinners, and a really fun business idea that could literally go anywhere!

Back in the Saddle

After an unanticipated leave from the blog, I’m back in the saddle and thought it would be fitting to write about one of my favorite trends in interior design – Horses!

A classic black and white, almost sepia toned print of a lone horse is simple and beautiful

A hand carved horse adds a kick to a masculine space

If I ever lived in Texas, I would snap up this funky carafe and wine glass set in a heartbeat

I decided to take a stab at the horse theme by painting one myself on a salvaged window

It’s a work in progress but not too bad for a first attempt

Giddy Up, Y’all!

Images Courtesy of Z Gallerie, Restoration Hardware and Etsy

Sunday in the Park

A couple of weeks ago I got my first taste of what it would be like to have my own store.  I rented a space at a little festival in my neighborhood called Sunday in the Park.  It was a gorgeous day – sunny and about 80 degrees, so I set up my  area with a few of my wreaths along with the salvaged window I painted…

And of course a couple of pillows from the new line!

My family came out to show their support and of course my dad was goofing around on Marshall’s crutches rather than helping sell, sell, sell!

My mom displayed a few of the seashell sculptures she’s been working on the last few years.

And my old college roomies, Kristina along with her adorable family (not pictured), and Summer, came by to lend their support.

In the end the event turned out to be more of a neighborhood gathering than an art and home decor show, so I only sold a couple of the smaller items and mostly to friends and family.

But I did make some great connections and met a lot of local business owners who gave me some much needed advice on getting my store off the ground… one day!

Building the White Bungalow Brand

Turns out finding a retailer to carry my pillows is the easy part in starting a pillow line. For the past week I have been pouring over fabrics, running and re-running cost analysis reports (somebody shoot me!), interviewing sewers, calling on more retailers to carry the line and answering the door every time UPS arrives with another delivery!  From the not so sexy pillow forms…

To the bolts of fabric chosen based on pattern, price, and availability, in that order.

Each pillow will have a linen backing…it’s like two pillows for the price of one

Even the baby line, Hush

I wake up in the middle of the night with fabric costs dancing in my head.

I see now why so many companies wind up manufacturing in China, but I’m determined for the pillows to remain hand sewn in my community, so I’ve got to cut costs everywhere else so that can happen!


Previous Older Entries Next Newer Entries